How to Make Moonshine – The Signature Homemade Alcohol
*Note*- This page will teach you how to make moonshine in a basic and traditional sense. However it is also going to be made as easy as possible for folks to do at home so there will be some differences in how this will be made compared to how some professional moonshiners would do it simply because it would be too difficult for homemade purposes.
Moonshine (or corn whiskey) is a drink that has deep roots in history, especially American history, so it only makes sense why people would and should know how to know how to make their own moonshine. If you are unsure as to what moonshine is exactly please feel free to read this page where you can learn some basic background and information about moonshine.
Often times when people think about homemade alcohol the term “moonshine” jumps into their heads. Anyone who is getting into homemade alcohol or home distilling/liquor making should know how to properly make this iconic drink. So without further ado let’s dive into the specifics into making moonshine.
Step 1: Understanding the Process & Basic Terms
Making moonshine involves 3 basic processes:
1) Making the Mash
2) Fermenting the Mash
3) Distilling the Mash
We will dive into each of these processes separately a little later on but first let’s go over a few quick and basic terms around moonshine:
- Mash – The substance that is made which is fermented, distilled, and then becomes the moonshine.
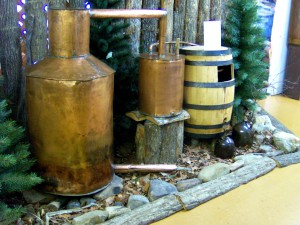
- Still – The piece of equipment in which the mash is distilled in, the mash is boiled and then condensed into liquor in the still.
- Distillation – The process that turns the low alcohol mash into high alcohol moonshine, occurs in the still. *To learn more about distillation go to this page.*
- Fermentation – The process of making the mash alcoholic by the yeast converting the sugars into alcohol. This is a naturally occurring process.
Step 2: The Ingredients & Equipment
The ingredients to make a moonshine mash can vary greatly, there are TONS of different types and flavors of moonshine, all with varying recipes. However a constant among all moonshine ingredients is the need for yeast, a nutrient (grain or sugar usually), and water. Many recipes also involve a malted ingredient such as barley or rye.
Here you are going to learn how to make a basic corn-based mash which will produce a classic type of moonshine.
The ingredients you will need are:
- Corn Meal
- Sugar
- Water
- Yeast (Distillers yeast is recommended)
You are going to need a still, this is the single most important aspect to making moonshine, or any liquor for that matter. If you plan to make several batches of moonshine or other homemade liquor I HIGHLY recommend buying a still, trust me, it will save you a lot of time, effort, heartache, and money. It is indeed possible to make a still, however an improperly made still will be ineffective and can be dangerous. Click here for an article for more information on purchasing vs buying a still.
In addition to the still there are a few other things you will need:
- An airlock
- A fermenting container
- A metal pot for cooking your mash
- An adhesive strip thermometer (optional but helpful)
Step 3: The Recipe
The recipe we will be using is one that I like to call the 1 for 1 recipe, it produces a typical moonshine corn whiskey and the formula is super easy to remember. It’s called the 1 for 1 because all the ingredients are used in a 1 to 1 ratio. For example, for every 1 gallon of water, you would use 1 pound of sugar, and 1 pound of corn meal. So for a 5 gallon mash (which is recommended for your first batches of moonshine) you would use 5 gallons of water, 5 pounds of corn meal, and 5 pounds of sugar.
Now this recipe does not need to be exact by any means, because in the end it will be distilled and the alcohol is separated from the rest of the mash so preciseness is not necessary. Moonshine is more of an art than a science.
Step 4: Making the Mash
Now we are on the part where we will actually begin to put the ingredients together and make the moonshine. Making this moonshine mash is not very difficult or complex, all you have to do is:
- Take the water and heat it up to a lukewarm temperature, around 90-100 degrees Fahrenheit.
- Add the corn meal to the water and stir for a couple of minutes (if you do this with the heat still on make sure to keep it lukewarm and stir the bottom well so you don’t burn any of the cornmeal).
- Add the sugar to the mash and mix that in for another few minutes.
- Keep stirring until it seems dissolved for the most part.
*Tip* If you don’t have a pot big enough for the mash and don’t want to buy one that is, simply do it in 2 or 3 separate batches.
Believe it or not but that’s it for making the mash. Pretty simple right? Now we can get onto fermentation where we start making the alcohol! Very exciting stuff here!
Step 5: Fermentation
The final step before distilling is fermentation. In this step we will be transforming our mash from non-alcoholic to alcoholic. This naturally occurring process is the way ALL alcohol is made, beer, wine, whiskey, brandy, moonshine, it doesn’t matter it all starts with fermentation. So let’s begin!
-
-
- First you are going to need to pour your mash into your fermenting container, which can be just about anything that has an airtight lid that you can attach an airlock to. An example of cheap fermenter is a 5 gallon water cooler jug. For beginners I recommend purchasing a bucket fermenter, they are inexpensive and extremely convenient because the entire lid comes off making it easier to pour in your mash and already has a spot for an airlock to be put.
-
2. Now you need to add your yeast. This is the most important step of fermentation because the yeast is what turns the sugars in the mash into alcohol. All you need to do is pour in a packet of yeast (distilling yeast recommended because you will get more alcohol, moor moonshine, and a better tasting product). Just one small packet of yeast (roughly 2.5 teaspoons if you have one large package). Once the yeast is in the mash simply give it a little stir or shake up the container a little bit. *Note* This step can be done right before being put into the fermenter as well, it really doesn’t matter.
3. Take your bung and airlock and put it on your fermenter. If you do not have an airlock it is HIGHLY recommended you buy one, they are inexpensive (usually around a dollar a piece you can pick one up here.) *Note* The airlocks are essentially universal however the bungs are not depending on your fermenter you may need a smaller bung, please read this article for information about airlocks and bungs.
4. At this point you should have your mash with yeast in a fermenting container with an airlock on it. Now all you have to do is wait; after 1-2 weeks fermentation will be complete and no more alcohol will be produced.
If you have a hydrometer you can take gravity readings of your mash after around a week and if you get the same reading for 2 or 3 days in a row then you know fermentation is complete.
A hydrometer is a device that tells you specific gravity and alcohol percentage of a liquid. It is not necessary to have one in the beginning however can be a useful tool (especially for knowing the alcohol percentage of your finished moonshine). You will need separate ones however for testing your mash and moonshine (one can test low alcoholic percentage and another can test high). For a mash one click here and for a liquor/moonshine one click here.
Step 6: Distillation
Now you have your mash fermented and it should be around 8-20 percent alcohol depending on what kind of yeast you used. Now it is time to turn your mash into nice ol’ fashioned moonshine whiskey! Distillation separates the alcohol in the mash from the water. If you are at this point unsure how distillation works or how a still itself works please read this page. If you have a properly made still (if you need a still please read this still guide) then you are ready to go, all you need is a source of heat. The process is pretty simple.
- Pour your mash into the pot of the still, try to leave the bottom sediment in the fermenter because that contains yeast and it is preferable to not have yeast in the mash during distilling. Using an auto siphon makes this A LOT easier, one can be purchased on Amazon for around $10)
- Make sure everything is fastened down and sealed on the still, pressure and steam is going to be going through it and you cannot have any leakage.
- Make sure there is something (ice/cold water) is cooling down the worm or condenser of the still.
- Apply heat to the pot of the still heating up the mash. Make sure to keep the temperature between alcohol and water’s boiling point (173 degrees Fahrenheit and 212 degrees Fahrenheit). A good temperature to keep it at is 185-195 degrees.
- As the still runs make sure you discard the first ounce and a half of moonshine for every gallon of mash, this part of the moonshine contains the most methanol concentration (stuff you don’t want to drink).
- After the initial bit has been discarded all you have to do is monitor the temperature and make sure it stays in the 185-195 range.
- Once there is no more liquid coming out of the end of the still into the collection jar you have completed your still run and should have some moonshine corn whiskey that is ready to go!
It’s time to celebrate because you just completed your first still run & made some good homemade moonshine!